|
» You are NOT logged in! |
LOGIN or REGISTER!
If you haven't registered yet, please do so by clicking here. The benefits of registering include an endless wealth of technical information, access to our forums, and best of all, this god awful big red eye sore of a notice will disappear!! |
|

|
» Short Shifter Installation |
|
Short Shifter Installation |
Article Date: 08-06-05
Author:
Spyder Z 15
Mod Class: Z32 NA or TT w/ Manual Transmission
Mod Type: Mechanical - Transmission
Article Origin:
Zmods.org
Difficulty Level:
3
(Scale of 1 to 10. 1 being extremely easy, 10 being extremely
difficult.)
Estimated Time to Complete: Less than an hour
Tools Required:
10MM Socket with 6" extension |
Step 1.
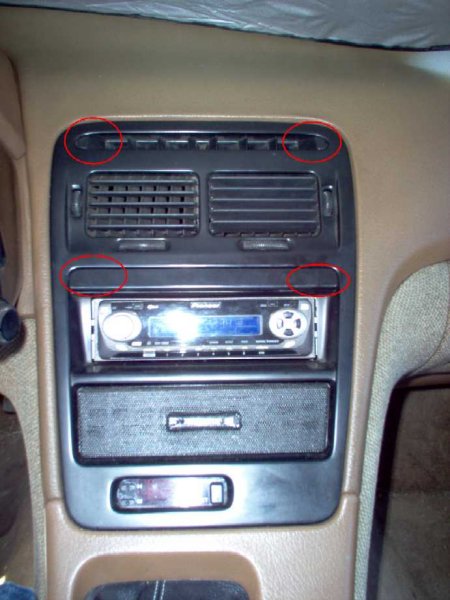
To take off the console you need to pop out the black strip carefull so you
don't break it.
I use a flathead screwdriver to pry it out a little and use the flat head to
move the clips so it pops out with ease. On the 2 corner pieces on top I just
popped them off with a flat head screwdriver.
Step 2
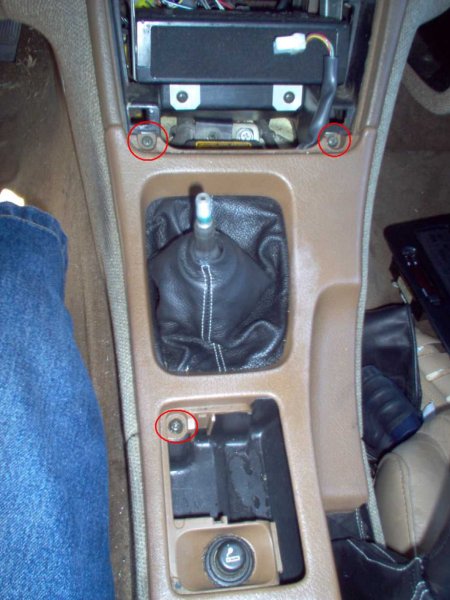
To remove the console finisher use a phillips screwdriver to remove the 2 screws
on top and the one located under the ashtray. Also remove your shift knob. Good
luck with that one. It was a royal PITA for me. Then take the console off.
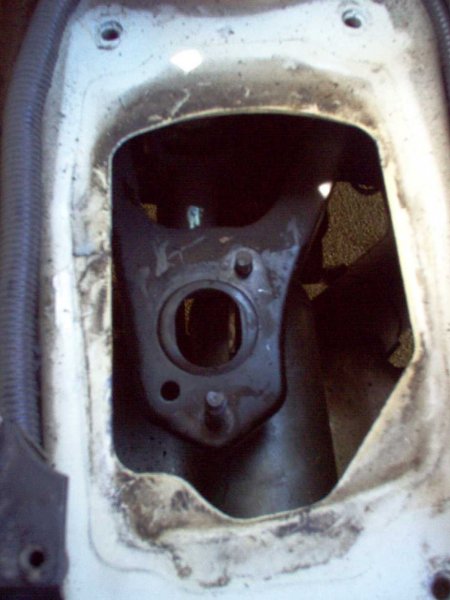
Step 3
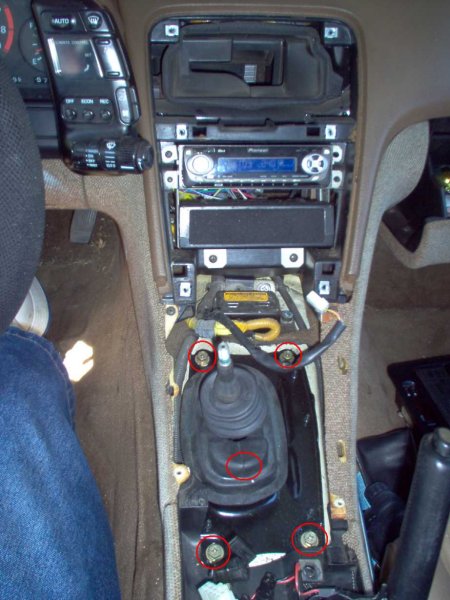
Ahhh. Scary. Use a 12mm socket (I believe it's 12mm) and take off all 4 bolts in
the corners. There is also a bolt hidden under the dust boot. Use the same
socket to take that off too. This would be a perfect time to replace the shifter
plate if it looks rotted. I had already replaced mine due to it breaking on me
while I was driving. Now it starts to get fun.
Step 4
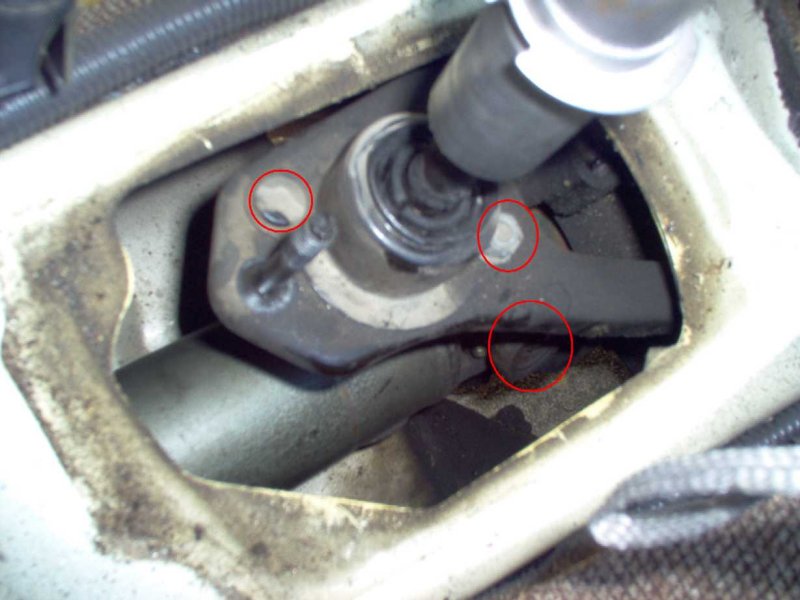
Take off both bolts holding the assembly up. The one on the back is the easiest.
The one on the front is underneath which can be challenging. Especially when you
have huge hands like me. There is also a bolt connecting the bottom of it to the
transmission fork. (If that's what it's called.) That one was my biggest PITA
for me. Took me probably about 30-45 minutes justy to get that bolt.
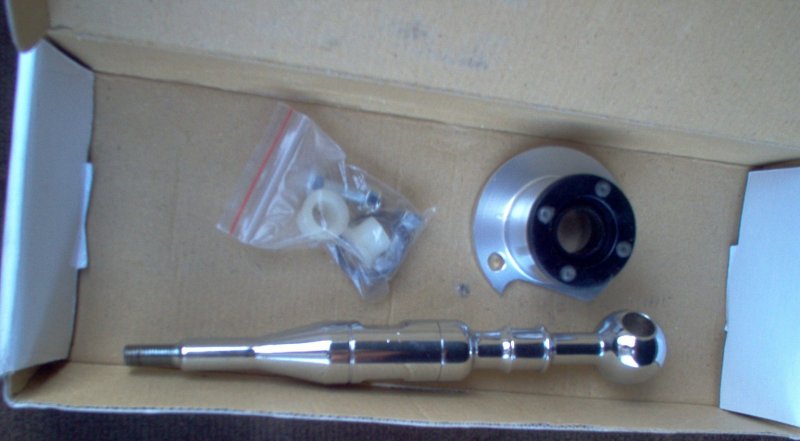
Step 5
Take a break. On the shifter assembly from AMZ install the bushings and collar.
Step 6
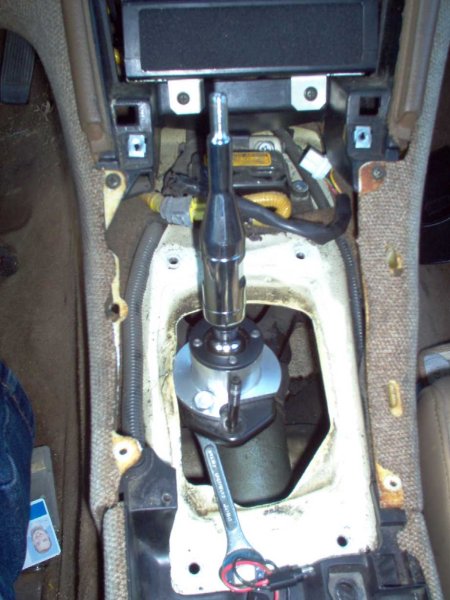
Take apart the shifter assembly and put it in the hole then under the plate.
Push the bolt through the ball and bushings through the fork. Tighten bolt, but
not to tight. Test it. Now Install the AMZ base on top of the half assembly.
Bolt it in using supplied bolts for the front. On the rear I only needed the
nut. Then screw on the rest of the assembly. And reverse the previous steps to
reinstall the interior. Then go out and enjoy. Hope this helps everyone.
|
|
|
» You are NOT logged in! |
| You made it to the bottom of the page, and still aren't logged in!! If you haven't registered yet, please do so by clicking here. The benefits of registering include an endless wealth of technical information, access to our forums, and best of all, this god awful big red eye sore of a notice will disappear!! I'm sure you're tired of looking at this gaudy notice by now! |
|
|