» You are NOT logged in!
LOGIN or REGISTER!

If you haven't registered yet, please do so by clicking  here. The benefits of registering include an endless wealth of  technical information, access to our forums, and best of all, this god awful big red eye sore of a notice will disappear!!
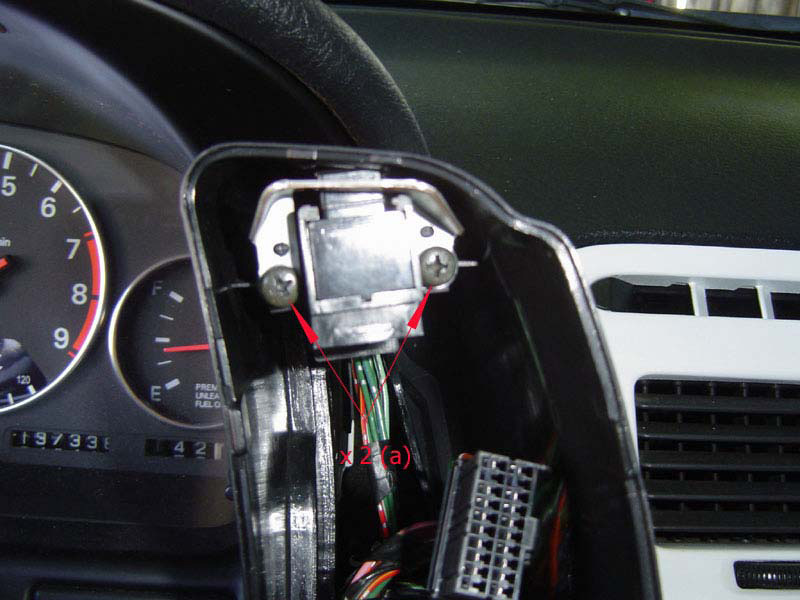
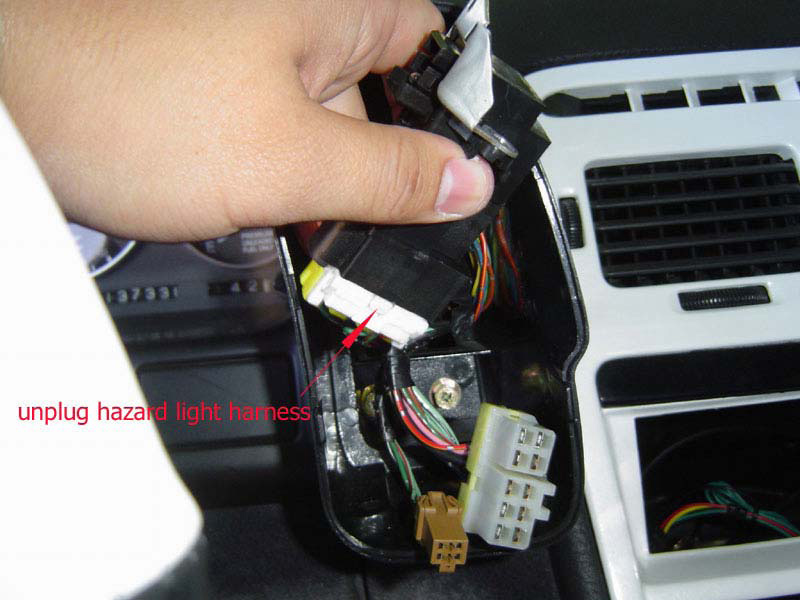
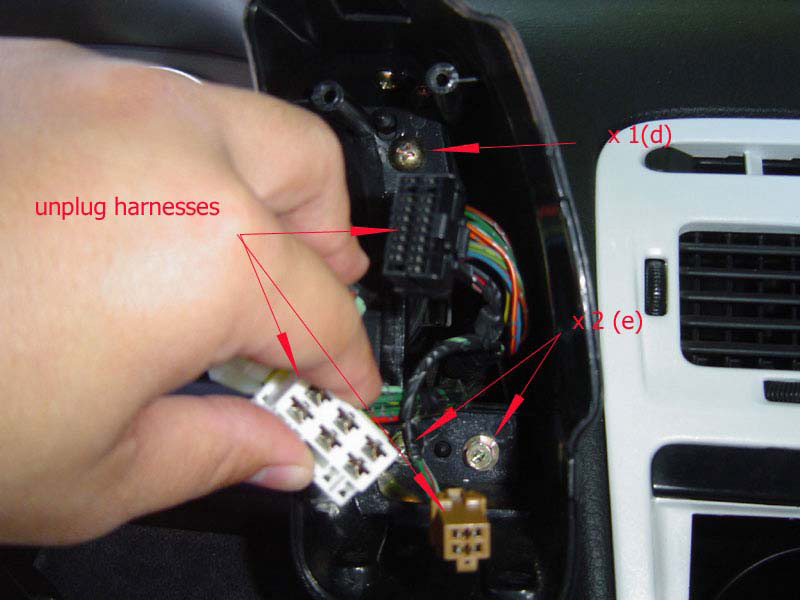
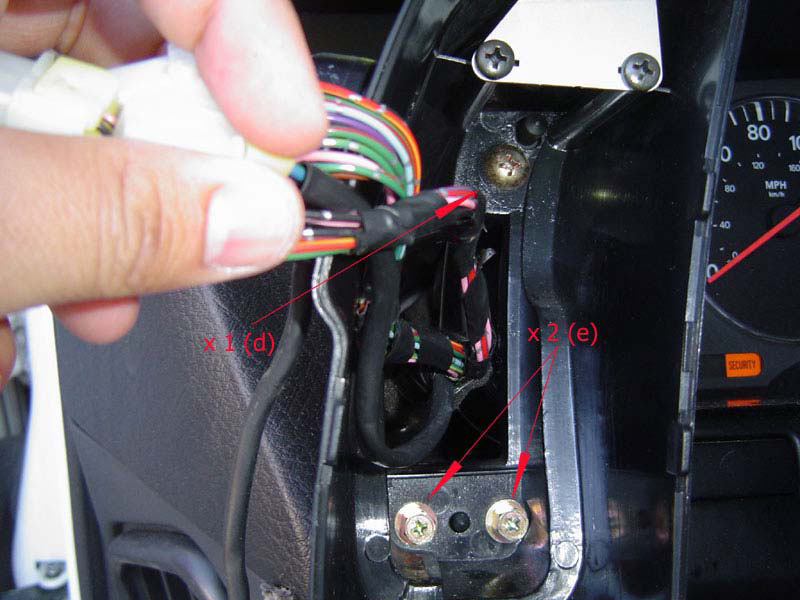
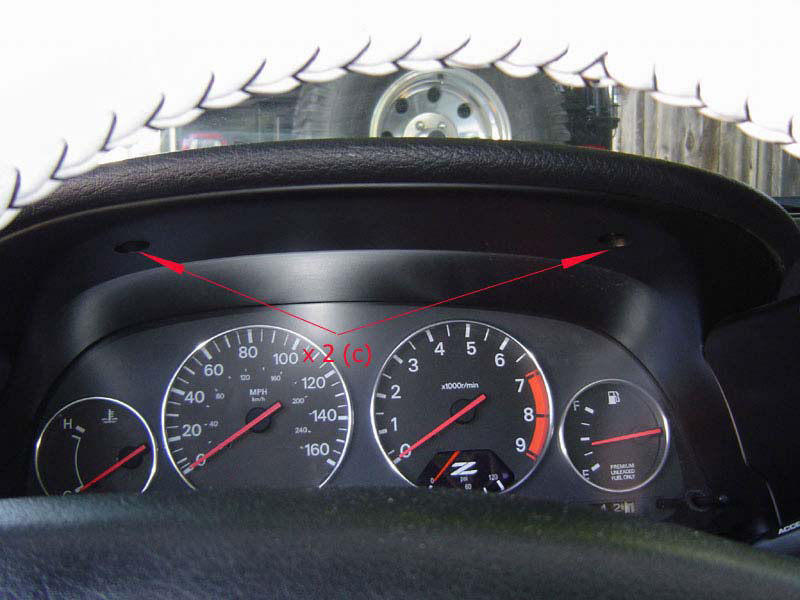
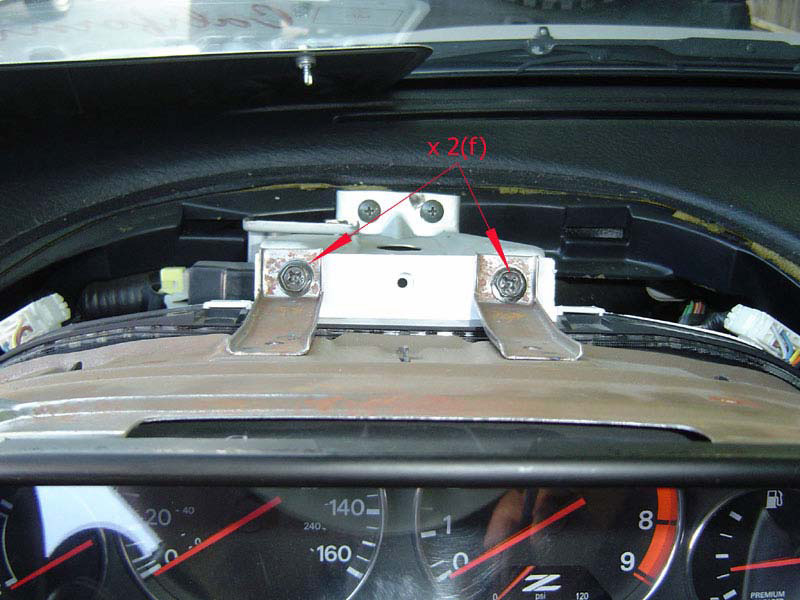
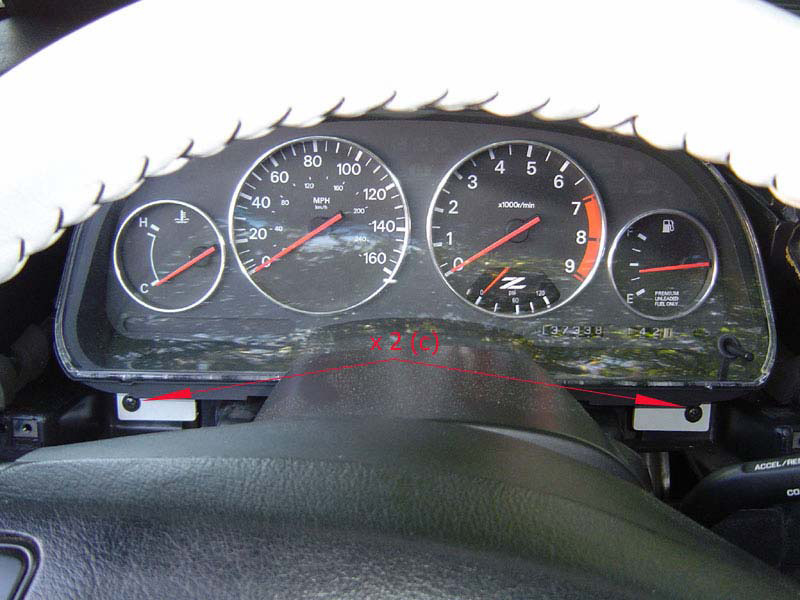
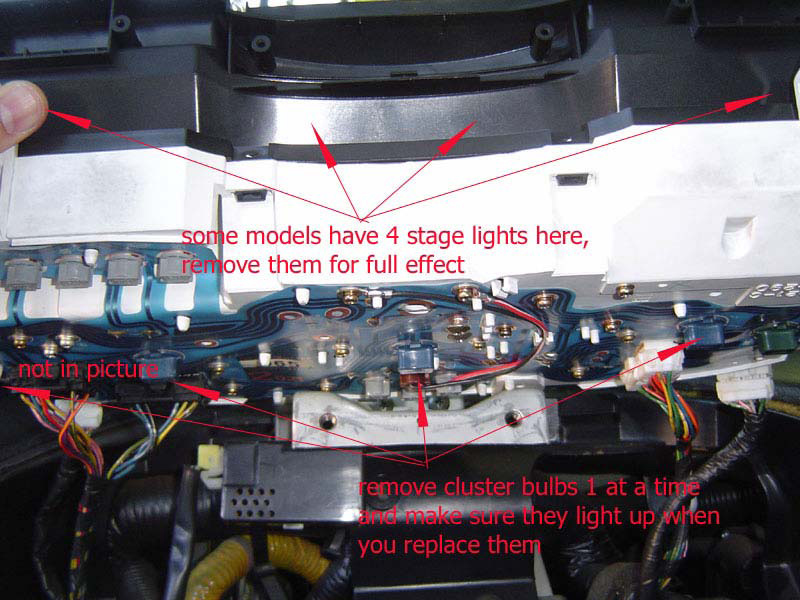
» Dash Light Upgrade to LED
Dash Bulb Replacement / Color Changing
Article Date: 10-18-06
Author: Malman2100
Mod Class: Z32 NA or TT
Mod Type: Cosmetic
Article Origin: www.300zxclub.com
Difficulty Level: 2 (Scale of 1 to 10. 1 being extremely easy, 10 being extremely difficult.)
Estimated Time to Complete: Less than an hour

Tools Required:
Phillips Screwdriver

These instructions will show you how to remove your instrument cluster so that you may change the color of your dash lights or install some nice polished aluminum gauge rings.

Credit for these instructions goes to Michael Phorn, 3ZC member shift_nismo, as well as credit for the photos. I am just putting it in thread form to make it easier to find.

If you would like more info getting these custom color LEDs for your dash contact Mike at [email protected].


All that you need for this job is a phillips head screwdriver and some patience. Go easy when dealing with the plastic on our Zs, they are getting up there in age. This job will take about 30 mins the first time you do it, after youve done it before you do the whole thing in about 15 mins.

SCREW REFERENCE:


Begin on the left pod containing the light controls. Remove the 2 screws from underneath and unplug the harnesses.


Move on to the right control pod containing the AC controls or climate controls (depending on your model) Pop off the hazard light switch in a straight up fashion.


Now remove the 2 screws from underneath the pod.


Unplug the harnesses from the pod controls and remove it. You will now see the 2 screws holding the hazard light switch in place, remove them.


Now unplug the hazard light harness and remove the switch.


Now remove the remaining screws inside of each pod.


Remove the cluster lid.


And remove the screws holding the top of the instrument bezel in place.


With a firm grasp using both hands holding onto the cluster bezel pull towards you smoothly. The bezel will pop twice, once for each side of the steering column. On the 90 models you will have to unplug the harness for the warning lights on the lower right hand side of the bezel. After you pop the bezel out, you need to snake the harnesses inside the pods through the holes in the back to get the bezel out of your way.


Now remove the final 2 screws holding the instrument cluster in place.


Now just remove the harnesses that are plugged into the back of the cluster (my 90 model had 3) and lift it right out.

At this point if you are doing polished rings all you need to do is pop the clear cover off of your cluster and install your rings. They pop right into place, I put a tiny drop of super glue on mine because of stories of the rings popping off and causing needle damage.

If you are changing bulbs refer to the picture below.


Thats it. Be sure to check all of your bulbs by reconnecting the light and AC pods before putting it all back together. The LEDs have to be installed with the correct polarity so if one doesnt light up give it a 180 degree turn in its socket.

Any questions give me a shout ([email protected]) or contact Mike at [email protected].

If you would like a PDF version of this writeup you can find it here:
http://www.westcoastz.net/westcoastz/installation/instrumentcluster.pdf


3ZC screen name: Malman2100
AIM screen name: Malman2100

» You are NOT logged in!
You made it to the bottom of the page, and still aren't logged in!! If you haven't registered yet, please do so by clicking  here. The benefits of registering include an endless wealth of  technical information, access to our forums, and best of all, this god awful big red eye sore of a notice will disappear!! I'm sure you're tired of looking at this gaudy notice by now!


Zmods.org | Z32 Restoration & Tech © 2003 - 2022
Powered by: vBulletin Version 3.0.11
Copyright ©2000 - 2024, Jelsoft Enterprises Ltd.
All times are GMT -4. The time now is 06:29 PM.